Showing posts with label portrait painting. Show all posts

Friday, September 3, 2010

A charming new venue for painting classes

Back in May, when it became clear that the future of the Lothbury Centre remained uncertain, I decided to move my classes to the Old Reading Room, still in Weston Colville.

This week saw the start of these classes, " Painting for Pleasure " and Portrait Painting. I am delighted to say that lots of my students from the Lothbury decided to make the move as well, so it really was like meeting up with old friends.The new setting for the classes is really charming with lots of character, from great arching timber beams and fireplaces to excellent modern facilities.


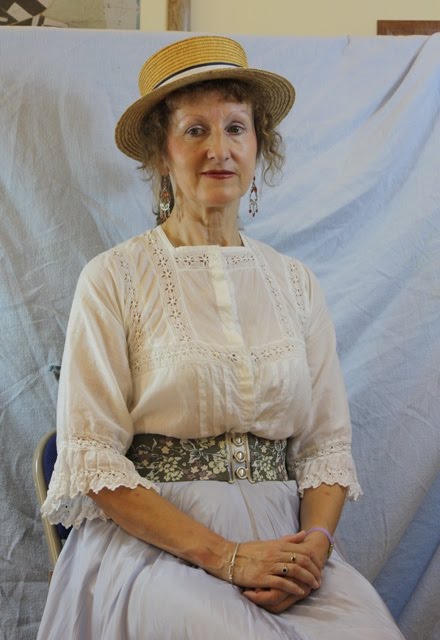
Our model for the portrait class was Lin, resplendant in Edwardian costume. Shades of Whistler and Singer Sargent!


All in all, it was a very pleasant and relaxed day. An excellent start to a new term in our new home.

These particular classes are fully booked this term. Anyone wishing to enrol for the January term ,however, should either e mail me at john@gloverart.co.uk or tel. 01284 810 460

Friday, May 7, 2010

New Painting classes starting in September

In September, I will be starting my own private weekly classes. These will be held in the Old Reading Room in Weston Colville, near Newmarket.

Both will be held on a Wednesday and will run for 10 weeks ( September 1st-November 3rd)

PAINTING FOR PLEASURE 10-12 am. Numbers will be limited to 12. Cost £105

PORTRAIT PAINTING 1-3pm. Numbers will be limited to 10. Cost £125


For full details call me on 01284 810 460 or email john@gloverart.co.uk

Tuesday, December 16, 2008

Painting a head and shoulders portrait in oils.


Sometimes, the most successful portraits are the simplest. It is very easy, particularly on a commissioned work, to get carried away with backgrounds, clothing , pose or symbol to explain who or what the person is.
This is a portrait of "Mary", a lady I have painted on many occasions. I felt that focussing in on her head, her expression and her gaze, captured her essential dignity and strength of character. To add anything else would have been a mere distraction.

Sunday, December 14, 2008

Acrylic/oil portrait painting 5


The finished portrait of "Val and Betty". It was published in Artists' & Illustrators' Magazine and was judged the "most popular painting " by the public at the Autumn Exhibition of the Cambridge Drawing Society in 2007.

Acrylic/oil portrait painting 4


Now I have started working in oils. In places, the pigment is solid and opaque. In other parts, I use scumbling or glazing techniques, allowing the original acrylic painting to show through and act as a foil.

acrylic/oil portrait painting 3


Out of the chaos, order gradually emerges. Details of clothing, the table and objects on it, and the window gradually appear. I am still working in acrylics and the process so far has taken around two hours.

Acrylic/oil portrait painting 2


Here, I am still working in acrylics. I now begin to feel my way into the composition. The figures are roughly drawn in, as is the basic perspective of the background setting. I establish a cool green underpainting for future warm flesh tones.

Using acrylics as an underpainting for oils


The previous oil portrait was done in a traditional manner. This time I am using acrylics as the underpainting. The reason? It dries extremely rapidly so layer upon layer can be built up quickly prior to adding the oils on top. It is spontaneous and can be great fun, as can be seen from the somewhat colourful and apparently chaotic illustration on the right. But the colours I am using are chosen very deliberately to pick up those in the subject.

The finished portrait painting in oils


Over a number of sessions, the details in the head and hands was built up. This involved various techniques- glazing, scumbling and the use of body colour. At times stiff pigment was used, at others the paint was diluted with medium. I favour a stand oil, dammar varnish and turpentine mixture. The background was added during this process as well as details of the chair and clothing.
The background was painted over the edges of the hair . When this was dry, the hair was dragged back over it and a sable rigger used to establish some of the finer wisps.

Saturday, December 6, 2008

Charcoal sketch to portrait painting in oils


Having decided on the finished preparatory sketch, I now prepared to do the oil painting. I chose to work on a fine linen canvas which I had stretched before applying two coats of size and two coats of oil primer. I then stained the canvas with a transparent wash of raw umber. This gives me a very useful mid tone on which to build my lights and darks.
I drew the figure in with a brush and fluid paint ( lots of turpentine) before moving on to the blocking in stage. All this time, I am checking angles, proportions, rhythms through the figure, and ,of course, position on the canvas. There is nothing worse than painting a fine head only to discover it's in the wrong place!
The accompanying illustrations show the painting in various stages of development. The head is well under way, the hands are just rapidly sketched in , and there are still large areas of the original staining. In my next blog I will show how the portrait was developed further.

Friday, November 28, 2008

How to create a charcoal portrait 3


Thanks Simon for your comments. These are usually fairly quick exploratory sketches, not worrying too much about either likeness or expression - they are mainly about pose and composition. If I did however, chance to get the "perfect expression", I would hope to recognise it and be able to replicate it in the final painting. The client and I both agreed that sketch 2 was not the "correct" one; the sitter is a very lively 92 year old who despite her physical frailty is mentally very alert, enjoys talking to people and is very aware of what is going on in the world. We both felt that sketch 3 expressed this better.

Wednesday, November 26, 2008

How to create a charcoal portrait 2


This drawing is another preliminary sketch for the finished painting. The materials and techniques used are the same as in my previous blog. Here, I have gone for a three-quarter length sketch as her arthritic hands were an interesting feature. Altogether I felt this pose produced a more reflective portrait.

Monday, November 24, 2008

How to create a charcoal portrait


This is one of a series of charcoal studies done in preparation for a finished oil portrait.

Materials: Smooth cartridge paper, willow charcoal, medium and soft charcoal pencils, compressed charcoal, black conte stick, soft cloth and a putty rubber.

Method: After establishing an initial outline, the area of the head was rubbed over with willow charcoal and smoothed with the cloth. The position of the main features was established before softening and lightening the mid-tones. The details in the eyes and mouth were built up using charcoal pencils. For the darkest tones, I used a combination of either conte crayon or compressed charcoal. The highlights were lifted out with a putty rubber.